A little problem that we had when we started to create trees and vegetation is that the standard mipmap generation algorithms produced surprisingly bad results on alpha tested textures. As the trees moved farther away from the camera, the leafs faded out becoming almost transparent.
Here’s an example. The following tree looked OK close to the camera:
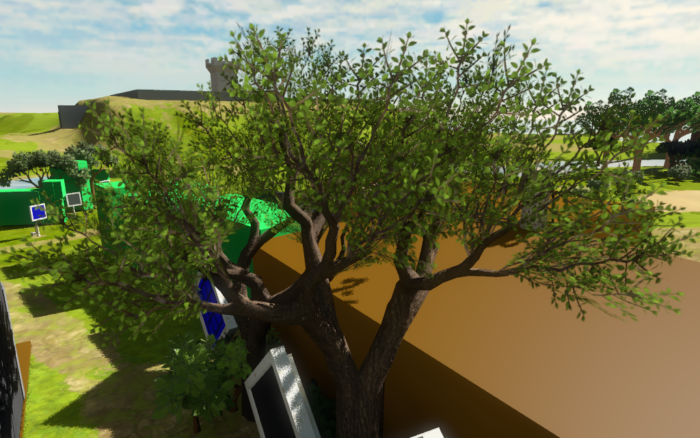
but as we moved away, the leafs started to fade and thin out:
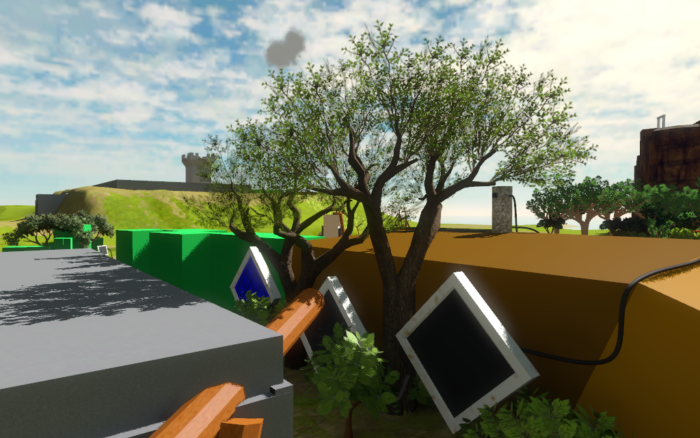
until they almost disappeared:
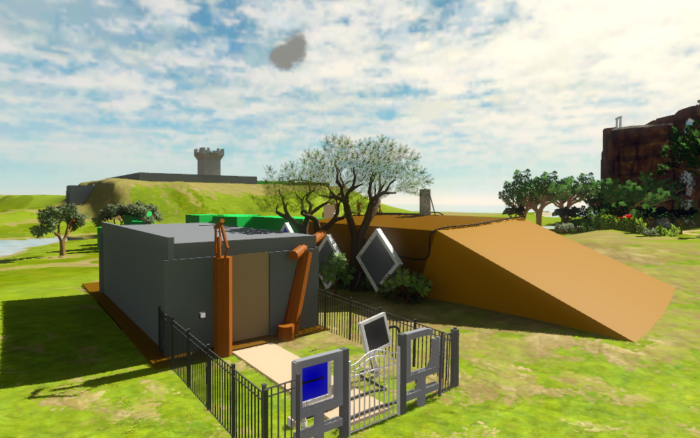
I had never encountered this problem before, neither had I heard much about it, but after a few google searches I found out that artists are often frustrated by it and usually work around the issue using various hacks. These are some of the proposed solutions that are usually suggested:
- Manually adjusting contrast and sharpening the alpha channel of each mipmap in Photoshop.
- Scaling the alpha in the shader based on distance or on an LOD factor estimated using texture gradients.
- Limiting the number of mipmaps, so that the lowest ones aren’t used by the game.
These solutions may work around the problem in one way or another, but none of them is entirely correct and in some cases add a significant overhead.
In order to address the problem it’s important to understand why the geometry fades out in the distance. That is because when computing alpha mipmaps using the standard algorithms, each mipmap has a different alpha test coverage. That is, the proportion of pixels that pass the alpha test changes, in most cases going down and causing the texture to become more transparent.
A simple solution to the problem is to find a scale factor that preserves the original alpha test coverage as best as possible. We define the coverage of the first mipmap as follows:
coverage = Sum(a_i > A_r) / N
where A_r is the alpha test value used in your application, a_i are the alpha values of the mipmap, and N is the number of texels in the mipmap. Then, for the following mipmaps you want to find a scale factor that causes the resulting coverage to stay the same:
Sum(scale * a_i > A_r) / N == coverage
However, finding this scale directly is tricky because it’s a discrete problem, in general, there’s no exact solution, and the range of scale is unbounded. Instead, what you can do is to find a new alpha reference value a_r that produces the desired coverage:
Sum(a_i > a_r) / N = coverage
This is much easier to solve, because a_r is bounded between 0 and 1. So, it’s possible to use a simple bisection search to find the best solution. Once you know a_r the scale is simply:
scale = A_r / a_r
An implementation of this algorithm is publicly available in NVTT. The relevant code can be found in the following methods of the FloatImage class:
float FloatImage::alphaTestCoverage(float alphaRef, int alphaChannel) const;
void FloatImage::scaleAlphaToCoverage(float desiredCoverage, float alphaRef, int alphaChannel);
And here’s a simple example of how this feature can be used through NVTT’s public API:
// Output first mipmap.
context.compress(image, compressionOptions, outputOptions);
// Estimate original coverage.
const float coverage = image.alphaTestCoverage(A_r);
// Build mipmaps and scale alpha to preserve original coverage.
while (image.buildNextMipmap(nvtt::MipmapFilter_Kaiser))
{
image.scaleAlphaToCoverage(coverage, A_r);
context.compress(tmpImage, compressionOptions, outputOptions);
}
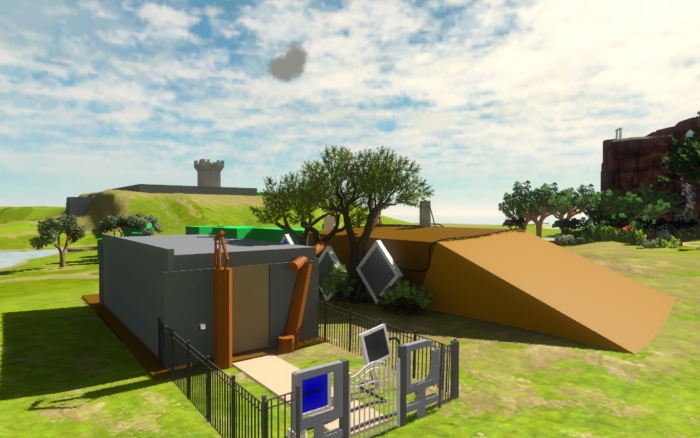
As seen in the following screenshot, this solves the problem entirely:
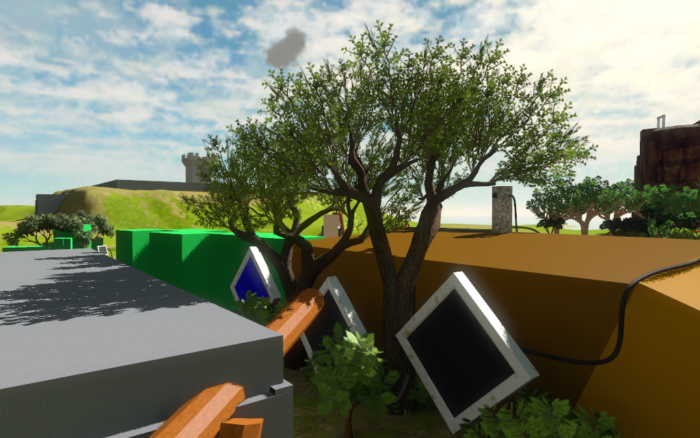
even when the trees are far away from the camera:
Note that this problem does not only show up when using alpha testing, but also when using alpha to coverage (as in these screenshots) or alpha blending in general. In those cases you don’t have a specific alpha reference value, but this algorithm still works fine if you choose a value that is close to 1, since essentially what you want is to preserve the percentage of texels that are nearly opaque.
This article was first published on The Witness website.